
The military habit all midlifers should steal
Winter has finally arrived.
The days are shorter, the ground is wet, and its finally feeling cold again. In other words, its the perfect time to start rucking!
Rucking is simple: you walk with weight on your back. A loaded rucksack, a weighted vest, or just a backpack with something heavy inside. That is the entire method. The benefits, however, are anything but simple.

What rucking does to your body
Exercise: Adding load to a walk elevates your heart rate into the aerobic training zone without the repetitive impact stress of running. Your posterior chain — glutes, hamstrings, erector spinae — works significantly harder than it would unloaded. Caloric expenditure increases by 30 to 40 percent compared to the same walk at the same pace without the pack. The cardiovascular and muscular benefits compound over time without accumulating the joint wear that running places on the knees and hips. For anyone in midlife managing previous injuries or simply wanting to train for decades rather than years, this matters.
Bone density: Axial loading — weight applied downward through the spine — is one of the most effective stimuli for bone mineral density. This is the same principle that makes resistance training so important for midlifers, particularly women post-menopause when bone density loss accelerates. Rucking applies that stimulus through a natural movement pattern for the duration of the walk. A 2021 study in Osteoporosis International found that progressive load-bearing walking was associated with significant improvements in lumbar spine and hip bone density in adults over 50.
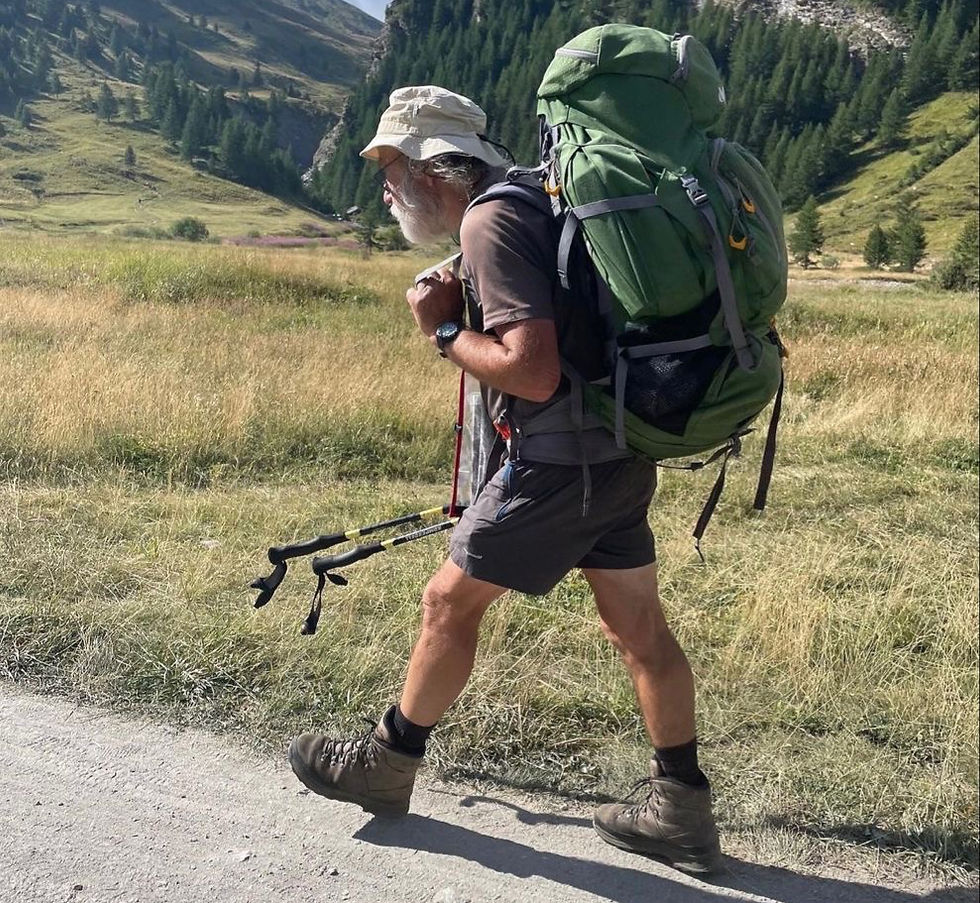
Posture: Done correctly, rucking actively reinforces good posture. Carrying load on the back requires the posterior chain and upper back muscles to work against forward rounding. Over time, this builds the muscular endurance that supports an upright position throughout the day — one of the most important but least discussed aspects of how we look, move, and feel as we age.
Metabolic health: Prolonged low-to-moderate intensity activity is one of the most effective tools for improving insulin sensitivity and fat oxidation. Rucking delivers both in a form that can be sustained for 45 to 90 minutes without the recovery cost of higher intensity training. Regular rucking also supports healthy fasting glucose and reduces visceral fat over time.
Sleep: Extended outdoor physical activity, particularly in natural light, anchors the circadian rhythm and promotes deeper slow-wave sleep. The physical demand of carrying load produces a level of productive fatigue that sedentary or lightly active days do not. Morning or early afternoon rucks are consistently associated with improved sleep onset and quality that evening.

The mental dimension
Going out in late October with weight on your back — in the rain, in the cold, when every other option is to stay inside — that is a choice that does something to your psychology.
Repeated voluntary exposure to physical discomfort trains the nervous system to respond to stress with greater equanimity. Your tolerance for discomfort rises. Your threshold for what counts as a difficult situation shifts. You become someone who goes out anyway.
This is the Handling Stress pillar in its most direct form: not techniques for managing stress after it arrives, but the deliberate building of a nervous system that handles it better in the first place.
Autumn and winter are not obstacles to rucking. They are the point.
How to Start Rucking: The Complete Guide
Rucking has no real barrier to entry. You do not need a gym membership, a coach, or specialist equipment to start today. What follows covers everything you need to begin safely and progress sensibly — when to go, how long to go for, how much to carry, and what to carry it in.

When to ruck: timing for maximum SHIELD benefit
Morning (6am–10am): The strongest option for circadian rhythm and sleep. Morning light exposure combined with physical activity anchors your body clock, suppressing melatonin and setting up a stronger sleep signal that evening. If sleep quality is a priority — and in midlife it almost always should be — a morning ruck is the highest-leverage time slot. The cortisol spike that naturally occurs on waking is channelled productively rather than dissipating into a sedentary morning.
Mid-morning to early afternoon (10am–2pm): A strong second option, particularly for metabolic benefits. Blood sugar regulation is most active in this window and a loaded walk during or after this period supports insulin sensitivity meaningfully. This slot also works well for those whose mornings are not flexible.
Late afternoon (3pm–6pm): Body temperature peaks in this window, which supports physical performance and makes this a good slot if pace and load are your priority that day. The sleep benefit is slightly reduced compared to morning, but still present. Avoid finishing a ruck within two hours of your intended sleep time — the elevation in core body temperature takes time to dissipate.
Evening (after 7pm): Not ideal for sleep quality if you are sensitive to exercise timing, but far better than nothing. If evening is your only option, keep the pace moderate and finish at least 90 minutes before bed.
How long to go
Duration builds gradually. Start conservative and add time before you add weight.
Weeks 1–2: 20 to 30 minutes per session. Focus on pace, posture, and how the pack feels. Two to three sessions per week.
Weeks 3–4: 30 to 45 minutes per session. Introduce gentle inclines if available.
Month 2 onwards: 45 to 60 minutes is the sweet spot for most midlifers — long enough to accumulate meaningful cardiovascular and metabolic benefit, short enough to recover well and go again within 48 hours.
Advanced: 60 to 90 minutes on hilly terrain, two to three times per week, represents a serious training stimulus. Beyond 90 minutes is diminishing returns for most people unless you are training for a specific event.
A simple rule: if you finish a ruck feeling like you could have gone another 20 minutes, the session was about right. If you are struggling to walk normally the next day, you went too hard too soon.

How much weight to carry
The most common beginner mistake is going too heavy. Start well within your capacity and build load over weeks, not days. The goal is progressive overload across months — the same principle that applies to resistance training.
Men
Start: 5–8% of bodyweight. For an 80kg man, that is 4–6kg. This feels lighter than expected — that is correct.
Build to: 10–15% of bodyweight over 6–8 weeks. For an 80kg man, 8–12kg. This is the range where most of the health benefits described above are well established.
Experienced: 15–20% of bodyweight. For an 80kg man, 12–16kg. Beyond this, benefit-to-risk ratio begins to decline unless you are training for a specific purpose.
Women
Start: 5% of bodyweight. For a 65kg woman, that is approximately 3kg. Bone density and metabolic benefits are well established at this load.
Build to: 8–10% of bodyweight over 6–8 weeks. For a 65kg woman, 5–6.5kg. This is the range to work within for most of the year.
Experienced: 10–12% of bodyweight. For a 65kg woman, 6.5–8kg. There is no benefit to pushing beyond this for general health.
In all cases: if you notice any lower back discomfort during or after a ruck, reduce the load by 20% and rebuild more gradually. Pack fit matters as much as pack weight — see below.

What to carry it in
You do not need to spend money to start. What you need is something that sits high and close to your back, distributes load evenly across both shoulders, and does not shift around when you move. Any of the following will work.
Option 1: Any backpack you already own — free
A standard school or commuter backpack with 20–30 litres of capacity is enough to start. Fill it with whatever is heavy and stable: water bottles, books, bags of rice or sand sealed in zip-lock bags, or a 5kg plate wrapped in a towel.
The limitation of a standard backpack is that it is not designed for load carriage — it may not sit high enough on the back or distribute weight as evenly as purpose-built options. For the first few weeks while you establish the habit and test your body's response, this is irrelevant. Start here.
Best for: Anyone who wants to try rucking before committing any money to it.
Option 2: A hiking or trail pack — £30–£80
A 25–40 litre hiking pack with a hip belt and load-lifter straps transfers weight more evenly between shoulders and hips, reduces upper back fatigue on longer rucks, and typically sits closer to the spine. You can load it with the same improvised weights as above.
This is the most practical and cost-effective step up from a standard backpack, and the hip belt makes a significant difference on sessions over 45 minutes.
Best for: Anyone planning to ruck regularly who wants better comfort and load distribution without specialist gear.
Option 3: A purpose-built rucking pack — £100–£200+
Brands like GORUCK, Brute Force, and 5.11 Tactical make packs specifically designed for load carriage. They feature reinforced back panels that hold weight plates flush to the spine, minimal external strapping that catches on nothing, durable construction built for years of regular use, and a carry system optimised for sustained weight bearing rather than day hiking.
GORUCK in particular has built a substantial community around rucking — events, training groups, and a culture that adds a social dimension to what can otherwise be a solitary pursuit. If the Interaction pillar matters to you, this is worth knowing.
Purpose-built packs accept standard fitness weight plates (usually 10lb or 20lb plates that slot into an internal sleeve), which makes load progression clean and consistent.
Best for: Anyone who has established the habit and wants equipment that will last, perform better on longer sessions, and accept standard weight plates.
Option 4: A weighted vest — £40–£150
A weighted vest distributes load across the chest and back rather than solely the back, which some people find more comfortable and which changes the muscular demand slightly — more anterior engagement, less posterior. It is also more practical for shorter, faster sessions where you want the weight without the bulk of a pack.
The limitation is that most vests have a fixed or limited weight range, and they are not ideal for very long sessions where a hip belt would help. Some people also find them warm — less of a concern in October.
Best for: Anyone who prefers the vest format, wants to combine rucking with other movement (bodyweight exercises mid-session), or finds a backpack uncomfortable.
One final note on pack fit
Whatever you carry it in, wear the pack high. The top of the pack should sit at or just above shoulder blade height. The bottom should not drop below the small of the back. A pack worn too low shifts the centre of gravity rearward, increases lower back strain, and reduces the postural benefit that makes rucking valuable.
Tighten the straps so the pack does not sway or bounce. If it moves independently of your body, it will cause discomfort over distance. Snug is correct.
Everything else — pace, route, weather — is secondary. Pack on, weight in, go.


Comments